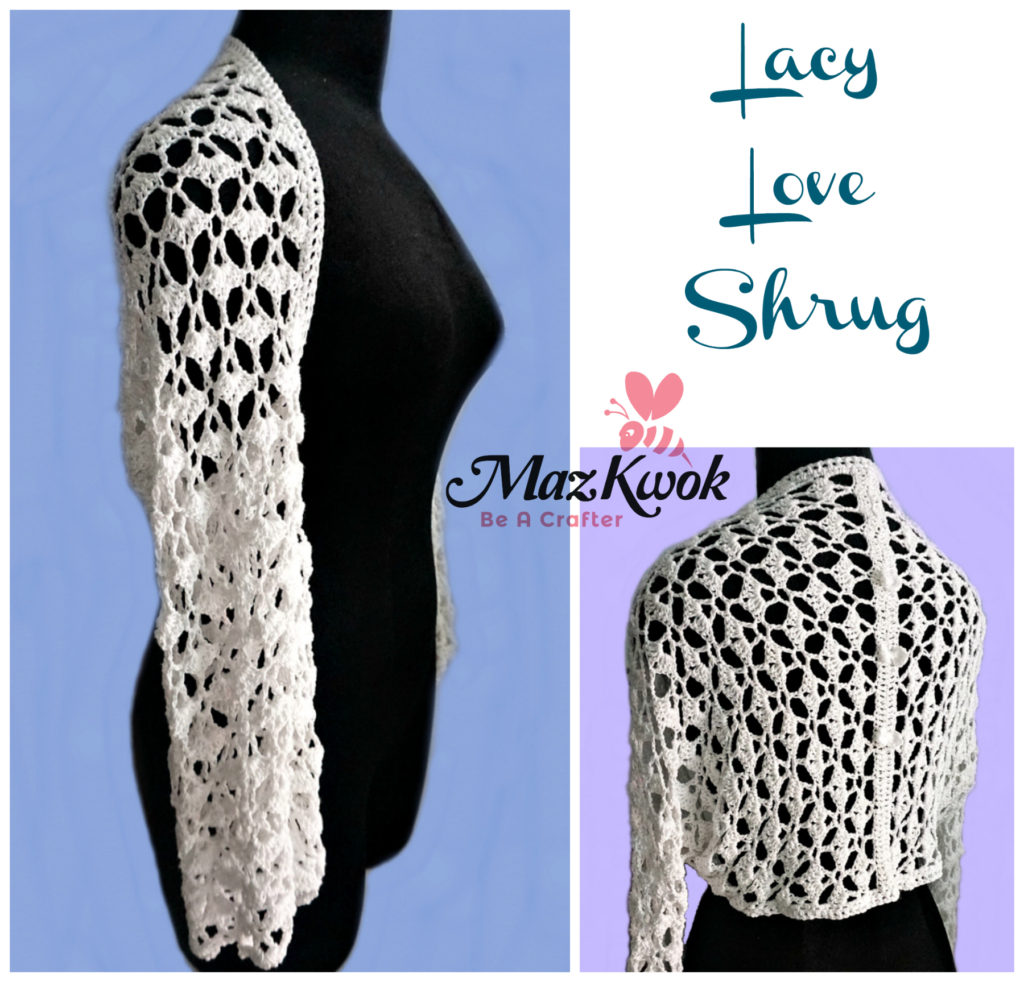
This ladylike crochet shrug is made with sportweight yarn. Lightweight and airy, a cute outfit for Spring and Summer time. I made the sample with elbow-length sleeves but you can always adjust the length as you wish.

Click here to <3 this pattern on Ravelry
Materials: ( I used )
3,5 mm crochet hook
Sport weight yarn: white (about 250 gr for the sample – size L/ 100 gr or 382 yds per skein)
Yarn needle
Scissors
Note: I used chainless starting dc for every first dc of each round/ row instead of ch 3. There’s another good crochet technique to use is ch 2, dc into the same stitch ( counted as 1st dc). In the pattern below you’ll see I simply state dc into 1st stitch for every first dc of each round/ row, so choose your best technique 🙂
Special stitch used:
3 dc – V stitch: ( 3 dc, ch 2, 3 dc ) into the same stitch or space.
This crochet lacy love shrug pattern fits sizes L and XL ( chest size: 36 to 42 inches )
Skill level: Intermediate
Gauge: 10 double crochet stitches x 4 rows approximately 2 inches ( with materials indicated )
Shrug:
(work in rows)
R1: Ch 83, dc into 3rd chain from hook ( the first 2 chain doesn’t count as 1st dc ), dc across, 81 sts, turn.
R2: dc into 1st stitch, * ch 4, skip 4 sts, ( dc, ch 4, dc ) into next st, ch 4, skip 4 sts, dc into next st * repeat ** 8 times across, turn.
R3: dc into 1st stitch, ch2, sc into next ch4-space, * skip 1 st, 3dc – V stitch into next ch4-space, skip 1 st, sc into next ch4-space, ch4, skip next st, sc into next ch4-space * repeat ** 7 times across, skip 1 st, 3dc – V stitch into next ch4-space, skip 1 st, sc into last ch4-space, ch2, dc into last stitch, turn.
R4: dc into 1st stitch, ch 2, dc into next ch2-space, ch4, * skip 4 sts, dc into next ch2-space, ch4, skip 4 sts, ( dc, ch 4, dc ) into next ch4-space, ch4 * repeat ** 7 times across, dc into next ch2-space, ch4, dc into last ch2-space, ch2, dc into last stitch, turn.
R5: dc into 1st stitch, 3dc into next ch2-space, * skip 1 st, sc into next ch4-space, ch4, skip 1 st, sc into next ch4-space, skip 1 st, 3 dc – V stitch into next ch4-space * repeat ** 7 times across, sc into next ch4-space, ch4, skip 1 st, sc into next ch4-space, skip 1 st, 3dc into last ch2-space, dc into last stitch, turn.
R6: dc into 1st stitch, * ch4, skip 4 sts, ( dc, ch 4, dc ) into next ch4-space, ch 4, skip 4 sts, dc into next ch2-space * repeat ** 7 times across, ch4, skip 4 sts, ( dc, ch 4, dc ) into next ch4-space, ch4, skip 4 sts, dc into last stitch, turn.
R7: same as R3
R8: same as R4
R9: same as R5
Repeat from R6 to R9 until you reach your desired length for the sleeves. Sc across as border at the last round.
Insert hook and join yarn at R1, repeat the whole process so you will have the other side.
Fold the edges of the rectangle, seam on each side to create sleeves, and adjust as you try it on.
Body edging: ( work in rounds )
R1: With color B yarn, from the right side, hdc around.
R2: dc around ( fasten off, weave in ends )
Little bows: ( make 3 )
With color B yarn, form a magic ring, work all into the ring: (ch 3, dc, tr, dc, ch 3, sl into the ring) x 2 times, fasten off the ring. Use color A yarn to wrap around the middle.
Attach to the middle line on the back.
You can have size 2XS to 3XL ad-free patterns with stitches diagram in this instant download pdf file on:
( There’s an itsy-bitsy fee for it, thanks for your support )
Happy crocheting xD
Written pattern and photos copyright Maz Kwok 2015. Please do not repost, republish or sell the content or photos as your own. You can sell the items you made from this pattern as long as you use your pictures and give back proper credit. Please do share this pattern with others by link. For more info, visit my Copyright page.
- Stay in touch via my social media channels: Facebook, Pinterest, Twitter, Instagram or subscribe to my Newsletter.
- Use the green button at the bottom of this post to print or save a PDF file for personal use.
