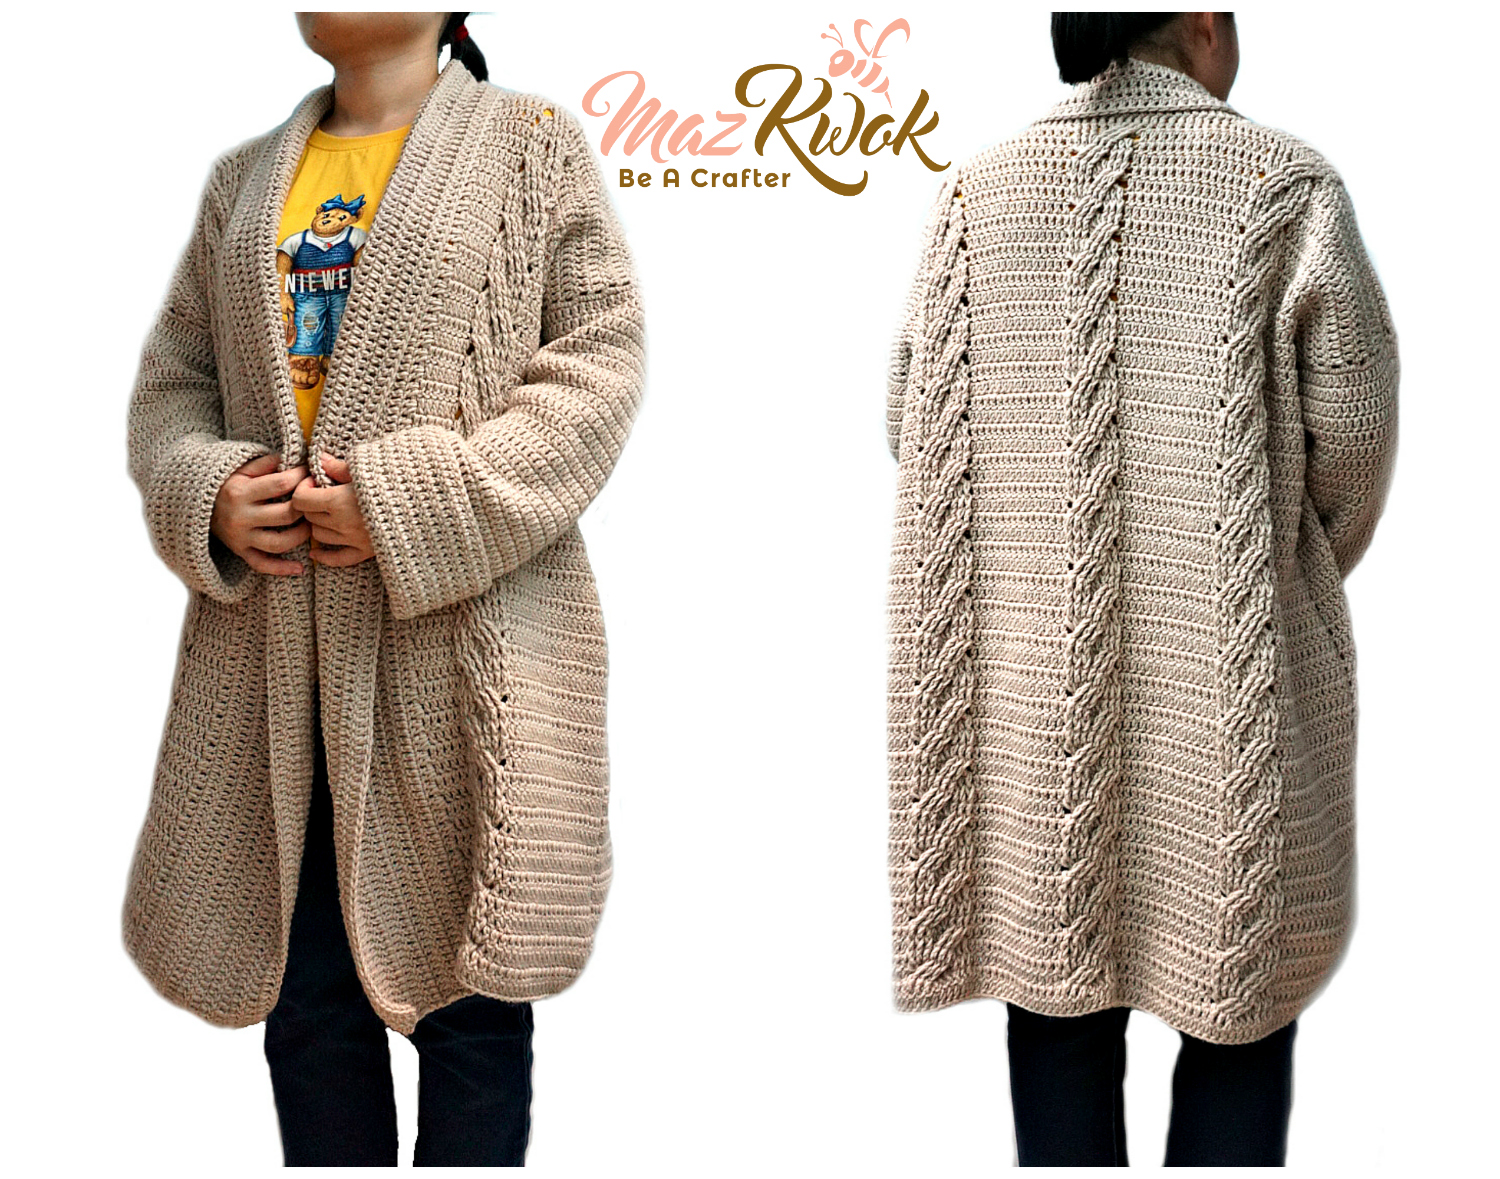
Must-have apparel on cold days? It should be a snuggle-up style cardigan crocheted with wool blended yarn. This crochet Snuggly cardi pattern is an elegant cardigan, designed with simple crochet stitches and embellished with cable lines.

Click here to <3 this pattern on Ravelry
Materials: ( I used )
5mm crochet hook
Worsted weight yarn: latte color ( about 1000 gr for the sample – size XL / 100 gr or 229 yds per skein )
( Check out my Yarn shop – free worldwide shipping )
Yarn needle
Scissors
Note: I used chainless starting dc for every first dc of each row/ round instead of ch 3. There’s another good crochet technique to use is ch 2, dc into the same stitch ( counted as 1st dc). In the pattern below you’ll see I simply state dc into 1st stitch for every first dc of each row/ round, so just choose your best technique 🙂
Special stitch used:
3×3 fptr left cross: ( worked over 6 sts )
skip 3 sts, fptr around each of next 3 sts, working in front of the fptr just made, fptr around each of 3 skipped sts.
This crochet Snuggly Cardi pattern fits size XL ( chest size: 40 to 42 inches )
Skill level: Intermediate
Gauge: 7 double crochet stitches x 4 rows = approximately 2 inches ( with materials indicated )

Cardi:
Back piece: ( work in rows )
R1: Ch103, dc into 3rd ch from hook ( first 2 ch doesn’t count as 1st dc ), dc across, total 101 sts, turn.
R2: 22 dc across, 3×3 fptr left cross, 3 fpdc around next 3 sts, ( 15 dc across, 3×3 fptr left cross, 3 fpdc around next 3 sts ) x 2 times across, 22 dc across, turn.
R3: 22 dc across, 9 bpdc around next 9 sts, ( 15 dc across, 9 bpdc around next 9 sts ) x 2 times across, 22 dc across, turn.
R4: 22 dc across, 3 fpdc around next 3 sts, 3×3 fptr left cross, ( 15 dc across, 3 fpdc around next 3 sts, 3×3 fptr left cross ) x 2 times across, 22 dc across, turn.
R5: 22 dc across, 9 bpdc around next 9 sts, ( 15 dc across, 9 bpdc around next 9 sts ) x 2 times across, 22 dc across, turn.
R6: 22 dc across, 3×3 fptr left cross, 3 fpdc around next 3 sts, ( 15 dc across, 3×3 fptr left cross, 3 fpdc around next 3 sts ) x 2 times across, 22 dc across, turn.
R7: 22 dc across, 9 bpdc around next 9 sts, ( 15 dc across, 9 bpdc around next 9 sts ) x 2 times across, 22 dc across, turn.
R8: 22 dc across, 3 fpdc around next 3 sts, 3×3 fptr left cross, ( 15 dc across, 3 fpdc around next 3 sts, 3×3 fptr left cross ) x 2 times across, 22 dc across, turn.
Repeat ( R5 to R8 ) x 13 more times until you reach R60
R61: 22 dc across, 9 bpdc around next 9 sts, ( 15 dc across, 9 bpdc around next 9 sts ) x 2 times across, 22 dc across, turn.
R62: dc across, total 101 sts ( fasten off )
Front piece: ( work in rows )
#1:
R1: Ch40, dc into 3rd ch from hook ( first 2 ch doesn’t count as 1st dc ), dc across, total 38 sts, turn.
R2: 22 dc across, 3×3 fptr left cross, 3 fpdc around next 3 sts, 7 dc across, turn.
R3: 7 dc across, 9 bpdc around next 9 sts, 22 dc across, turn.
R4: 22 dc across, 3 fpdc around next 3 sts, 3×3 fptr left cross, 7 dc across, turn.
R5: 7 dc across, 9 bpdc around next 9 sts, 22 dc across, turn.
R6: 22 dc across, 3×3 fptr left cross, 3 fpdc around next 3 sts, 7 dc across, turn.
R7: 7 dc across, 9 bpdc around next 9 sts, 22 dc across, turn.
R8: 22 dc across, 3 fpdc around next 3 sts, 3×3 fptr left cross, 7 dc across, turn.
Repeat ( R5 to R8 ) x 13 more times until you reach R60
R61: 7 dc across, 9 bpdc around next 9 sts, 22 dc across, turn.
R62: dc across, total 38 sts ( fasten off )
#2:
R1: Ch40, dc into 3rd ch from hook ( first 2 ch doesn’t count as 1st dc ), dc across, total 38 sts, turn.
R2: 7 dc across, 3×3 fptr left cross, 3 fpdc around next 3 sts, 22 dc across, turn.
R3: 22 dc across, 9 bpdc around next 9 sts, 7 dc across, turn.
R4: 7 dc across, 3 fpdc around next 3 sts, 3×3 fptr left cross, 22 dc across, turn.
R5: 22 dc across, 9 bpdc around next 9 sts, 7 dc across, turn.
R6: 7 dc across, 3×3 fptr left cross, 3 fpdc around next 3 sts, 22 dc across, turn.
R7: 22 dc across, 9 bpdc around next 9 sts, 7 dc across, turn.
R8: 7 dc across, 3 fpdc around next 3 sts, 3×3 fptr left cross, 22 dc across, turn.
Repeat ( R5 to R8 ) x 13 more times until you reach R60
R61: 22 dc across, 9 bpdc around next 9 sts, 7 dc across, turn.
R62: dc across, total 38 sts ( fasten off )
From the wrong sides:
Seam shoulder lines with sl or sc ( 38 sts across, match the cable lines of the back piece with the front piece )
Seam body lines with sl or sc ( 50 rows from the bottom up ).
Sleeves: ( work in rounds )
The sleeves are crocheted continuously from the armholes.
R1: from the right side, insert yarn and hook into the place you made the last sl or sc of seaming body line, dc around ( make 2 sts into each dc bar ), total 48 sts, sl into 1st stitch to join.
R2: 48 dc around, sl into 1st stitch to join.
R3 to R36: same as R2 ( fasten off )
Repeat on the other side for the other sleeve.
Collar and button line part:
R1: sc across the button line and neckline, until you reach the other end, turn.
R2: dc across the button line and neckline, until you reach the other end, turn.
R3 to R12: same as R2 ( fasten off )
Weave in ends.
You can have size S to 3XL ad-free patterns with stitches diagram in this instant download pdf file on:
( There’s an itsy-bitsy fee for it, thanks for your support )
Still, want more cozy cardigans? Take a look at this round-up: 41 Easy Breezy Cardigan Crochet Patterns
Happy crocheting xD
Written pattern and photos copyright Maz Kwok 2017. Please do not repost, republish or sell the content or photos as your own. You can sell the items you made from this pattern as long as you use your pictures and give back proper credit. Please do share this pattern with others by link. For more info, visit my Copyright page.
- Stay in touch via my social media channels: Facebook, Pinterest, Twitter, Instagram or subscribe to my Newsletter.
- Use the green button at the bottom of this post to print or save a PDF file for personal use.

Can you please give me your email address thank you and I can send the picture of what I am working on thank you
Please contact me via: mazkwok25@gmail.com
I’m confused I’m using the yarn you used and counted the stitches but when you say dc in 20 stitches at the end I still have 10 stitches left what am I do8ng wrong please help thank you
Can I take a look at your project picture? So I can see which is the problem.
Can I take a look at your project picture? So I can see which is the problem.
Can unplease tell me the yarn you actually used for this snuggly I really would appreciate this. I’ve tried to use the yarn I have but the count comes different. Ty
I meant to say can you please not unpleased
It’s Favourite Wool Latte color. You can check the link in the Materials section.
Love the cables on this coat. Can you provide the size dimensions for 1x, 2x and 3x? Is it designed to have the oversize style? It looks like I caould add buttons to the front-do you think this is doable?
Thank you for the lovely pattern!
Chest sizes for XL (40 to 42 inches), 2XL (44 to 46 inches), 3XL (48 to 52 inches)
Yes, this is an oversized style with great ease. You can add buttons if you want to 🙂
I’ve purchase the yarn from the site you have under the pattern in the red color. so I don’t understand it. let me ask you can I use red heart yarns. I will just have to play with it until I get it. thank you
Ofc, you can use any type of yarn for this pattern. Just make sure to have a similar gauge.