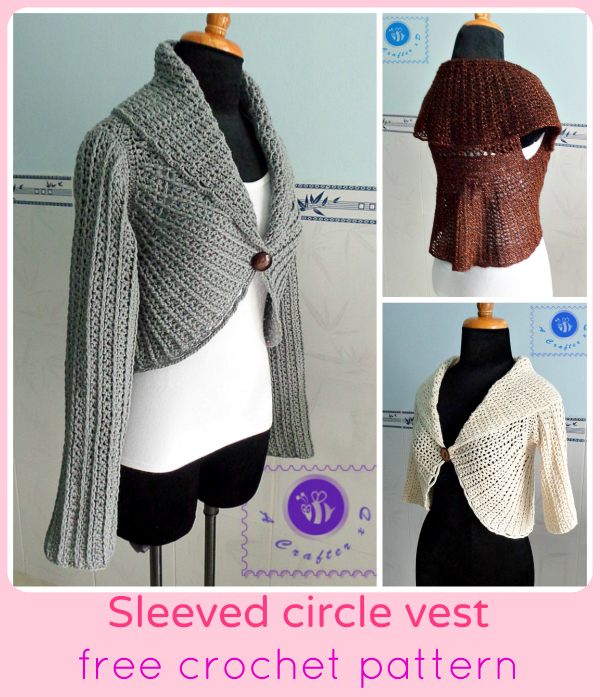
Have you ever tried to add sleeves to a crocheted circle vest? I managed to do it with this crochet-sleeved circle vest pattern – another good version of the Shawl Cir-collar vest.
Click here to <3 this pattern on Ravelry
Materials: ( I used )
5mm crochet hook
Sport weight yarn: copper ( 50 gr or 202 yds per skein )
Lightweight/DK yarn: gray, ivory cotton ( 100 gr or 393 yds per skein )
Yarn needle
Scissors
Button
Note: I used chainless starting dc for every first dc of each row/round instead of ch 3. There’s another good crochet technique to use is ch 2, dc into the same stitch ( counted as 1st dc). In the pattern below you’ll see I simply state dc for every first dc of each row/round, so just choose your best technique.
- Crocheted sleeve is started from the armhole. However, adding sleeves is always an option, simply increasing or decreasing rounds to get the length of your choice.
- I used up 500 gr of lightweight/DK yarn for the gray/ long-sleeved sample – size M. The amount of yarn depends on the type and size of vest you want to make ( with or without sleeves ) but I suggest at least 300 gr of lightweight yarn in hand to start a sleeveless vest.
- If you want to crochet smaller sleeves, I suggest a smaller hook size to narrow down the width.
Special stitch used:
V stitch: (dc, ch 1, dc) into same stitch or space.
This crochet-sleeved circle vest pattern fits sizes S and M (chest size: 30 to 34 inches).
Skill level: Intermediate
Gauge: 9 double crochet stitches x 5 rows approximately 2 inches

Pattern:
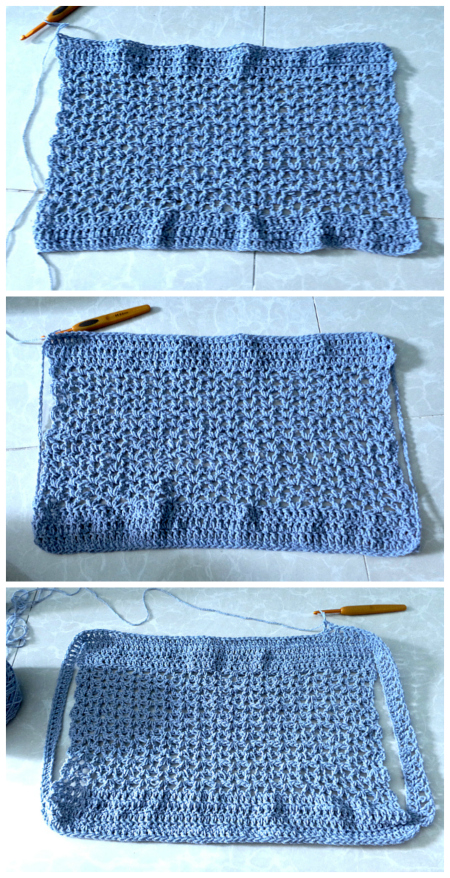
Back part: work in rows.
R1: ch 58, dc into the 3rd chain from hook ( the first 2 ch doesn’t count as 1st dc ), dc across, total 56 sts, turn.
R2 and 3: 56 dc across, turn.
R4: dc into 1st stitch, skip 1 st, (V stitch into next st, skip 2 sts) x 17 times across, V stitch into next st, skip 1 st, dc into the last stitch, turn.
R5: dc into 1st stitch, (V stitch into next ch1- space) x 18 times across, dc into the last stitch, turn.
R6 to R15: same as R5
R16: turn, dc across, total 56 sts
R17 and 18: same as R16
Circle part: work in rounds
R1: from the last stitch of R18 (of the back part), crochet a chain of 32, sc ( or sl ) into the 1st stitch of R1 (of the back part), 56 sc across, ch 32, sc ( or sl ) into the 1st stitch of R18 (of the back part), 56 sc across.
R2: dc into the chains, 32 dc across, inc dc into next st, 54 dc across, inc dc into next st, 32 dc across, inc dc into next st, 54 dc across, inc dc into next st, sl into 1st stitch to join, total 180 sts.
R3: (dc, skip 1 st, V stitch into next st, skip 1 st) x 45 times around, sl into 1st stitch to join.
R4: (2 fpdc around the dc of last round, V stitch into next ch1-space) x 45 times around, sl into 1st stitch to join.
R5: (fpdc, ch1, fpdc, V stitch into next ch1-space) x 45 times around, sl into 1st stitch to join.
R6: (fpdc, ch2, skip next ch1-space, fpdc, V stitch into next ch1-space) x 45 times around, sl into 1st stitch to join.
R7: (fpdc, ch1, dc into next ch2-space, ch1, fpdc, V stitch into next ch1-space) x 45 times around, sl into 1st stitch to join.
R8: (fpdc, skip next ch1-space, V stitch into next st, skip next ch1-space, fpdc, V stitch into next ch1-space) x 45 times around, sl into 1st stitch to join.
R9: (fpdc, V stitch into next ch1-space, fpdc, V stitch into next ch1-space) x 45 times around, sl into 1st stitch to join.
R10 to R22: same as R9
R23: (sc, ch4, skip next V stitch) x 90 times around, sl into 1st stitch to join.
R24: sc around, sl into 1st stitch to join. (fasten off, weave in ends)
You have finished a versatile circle vest.
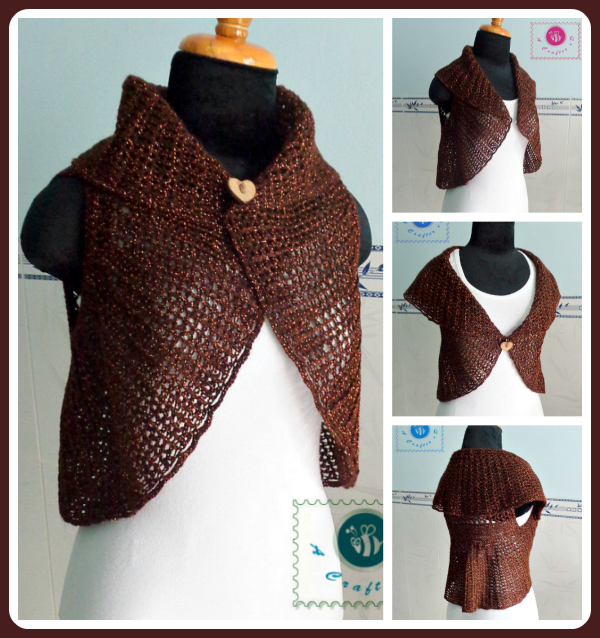
( I used up 3 skeins of Vanna’s Glamour for this one. Very lightweight! )
Sleeves: work in rounds
R1: Insert hook into the 1st or last chain from R1 of the circle part. Sc around the armhole, 1 sc into each chain, 2 sc into each dc space (the dc of the back part). Total 68 sts. Sl into 1st stitch to join.
R2: 68 dc around, sl into 1st stitch to join.
R3: (fpdc, skip 1 st, V stitch into next stitch, skip 1 st) x 17 times around, sl into 1st stitch to join.
R4: (fpdc, V stitch into next ch1-space) repeat around x 17 times around, sl into 1st stitch to join.
Repeat R4 until you reach your desired length. (fasten off, weave in ends)
Steam block your finished project. Try on and choose the best position for a button.
You can have size XXS to XXL ad-free patterns with stitches diagram in this instant download pdf file on:
( There’s an itsy bitsy fee for it, thanks for your support )
Happy crocheting xD
Written pattern and photos copyright Maz Kwok 2014. Please do not repost, republish or sell the content or photos as your own. You can sell the items you made from this pattern as long as you use your pictures and give back proper credit. Please do share this pattern with others by link. For more info, visit my Copyright page.
- Stay in touch via my social media channels: Facebook, Pinterest, Twitter, Instagram or subscribe to my Newsletter.
- Use the green button at the bottom of this post to print or save a PDF file for personal use.

Thank you so much! I feel so silly to have posted that query! Once I made sure I had 180sts (I cheated on that cos somehow I had ended u with 182, I did not really want to redo) it was really straightforward! I am having so much fun making it. Simple and superb pattern. I don’t get the kind of yarn you mention, here in India, but the pattern makes my not so great yarn look pretty beaut! Thank you for sharing and for helping.
You’re welcome 🙂
Hi! Love the pattern and this is the most complicated Crochet project I’ve taken on. R5 of the circular part, how am I to fpdc and then ch 1, fpdc then V stitch? The V stitch space is not adding up.
Hi,
You will fpdc around the fpdc of the previous round, The V-stitch will be made into the ch1-space of the V-stitch from previous round.
Spectacular: I have not tried to crochet because I thought it was very difficult for me. But with the pattern, the comments and your explanations, I know it’s not difficult. I will try as son as posible. Thanks.
Have you thought of crocheting a flower or other small embellishment in the same yarn as the vest. You can then sew the button on the back of this embellishment and to close the vest you would insert the button from the outside to the inside of both sides of the vest. This would allow you to change the position of the closure based on your outfit or mood of the day. You could even create multiple embellishments to go with a vest to make it more versatile.
This is the first time I know of a ” brooch ” like that. Thank you for the great idea 🙂
Hoping to see pictures soon. 🙂
Love the sleeves! I’ve made this vest and thought it would look great with sleeves. Thank you for this pattern! I will definitely make it again with your sleeves.
Very nice
Good evening! Ok, so, I started this pattern as soon as I received 4 skeins of Berocco Floret yarn from my daughter. I didnt pay attention to the amount needed to complete it and ended up asking her to send me three more skeins, which again was not enough! Oh my! I ordered another 5 skeins, and it still isnt enough to make it a long sleeved garment, however I was able to make both sleeve the same length. This has taken 600 yards with a sleeve that comes to the elbow. Also, with a 68 stitch count for the sleeves, they are VERY wide (using 5mm hook or an H), Oh, I could take the sleeves out and work them smaller, but I am not really that creative!
I thank you so much for this pattern!!!!! And I will post pictures to my facebook page mentioning this free pattern as soon as I block the vest
Hi Dawn,
Thanks for sharing your experience on this pattern. Berocco Floret worsted weight yarn is only 50 gr per skein, for sure you have to get many skeins to make a vest with sleeves. About the sleeves, if you want smaller sleeves, I would suggest a smaller hook ( 4mm or so ). I’d love to see your finished project 🙂
Maz, this is brilliant. I am hoping to make a vest with Sophie’s Mandala one day, and if I do, these sleeves will be perfect!
Dear Dedri, I’m in love with your Sophie’s Mandala. Can’t wait to see it turns into a circle vest 😀
so pretty Maz! You are so super creative and we so appreciate that you share your patterns with us!
What a great idea, it looks lovely! Thank you for sharing the pattern 🙂
Thanks so much for including a print-friendly option. I have some copper and gold yarn that I can’t wait to try this on.